Appendix B: Studying for and Taking Tests
Studying for art history tests requires memorization, synthesis of information, and attempts at prediction. Memorization is both visual and text-based, and requires continuous efforts for greatest success. Many students have not been trained in memorization techniques because their K-12 teachers themselves were taught that memorization is useless. To the contrary, memorization is a foundational tool that frees time for higher levels of thought and is vital to education generally. Without it, we would have to look up information constantly without being able to build upon it and apply our analytical skills to it.

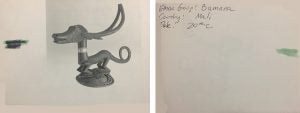
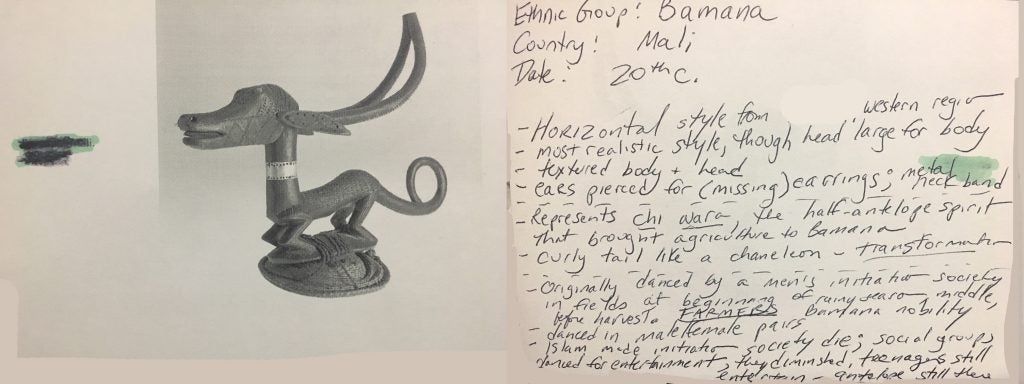
Memorization in art history involves two levels: basic information attached to visuals and contextual information attached to those same visuals. The basic identification of visuals requires constant practice; hasty attempts to memorize the day before are doomed to produce a jumble of unrelated information. The best way to memorize basic identification (artist’s name, ethnic group and/or site, country, and century) is by producing flashcards from the images supplied by your instructor. Print them out, four or six to a sheet and cut them up. Copy the ID information to the back, then cut it or cross it off the front; it may be useful to glue the flimsy photocopy paper to a large index card. You may want to add some definition cards to your pack as well, with the term on one side and its meaning on the other, as well as cards that have maps for country identification and art type and its associated gender.

Some images in the very beginning of the course may really not go beyond the identification and style description level, but once context became part of the class discussion and readings, more information on meaning and function was generated. That should be added to the back of the card, under the basic ID information (Fig. f). You should go back to your class notes and readings notes, and the synthesis of information can now be grouped roughly into information about style (this can be added on the fly if you have internalized your stylistic elements, principles of design, and “rules” for traditional art), meaning, and function. Writing this information down again and grouping it in a new way can help sink it more deeply into your memory.
Creating such cards as the course progresses (rather than waiting until a few days before the test) is the best method. Once the cards are made, use them like grade school flashcards for the quick ID information. It’s best to do this with another person or a group–a child is an ideal flashcard partner because they will take their job as interlocutor seriously and enjoy scolding you for wrong answers. Cards should be shuffled, since items on a test will not be in the order they were covered in class. The interlocutor should only display the picture and ask one question, moving quickly. Ethnic group? Date? Country? Site or artist’s name (if these exist for that work)? They should shuffle again and ask different questions. Don’t do this for too long at a time, but do it more than once a day.
Review your card notes by glancing through them more and more frequently as a test nears. If you have a testing partner, they can ask leading questions about the object, such as: How is this used? Why does the tail look that way? Who uses this? For these kind of content pass-throughs, you are better off having a study partner who is in the class. One advantage is that you can compare cards–perhaps they took notes on an aspect that you didn’t and you can update your cards.
Working with a study group may also strengthen the members’ ability to predict what images the instructor may choose for comparisons or for long IDs. Usually these will be objects that were discussed at some length; once you realize that comparison/contrast questions share some features, but not all, you can often guess what images would make a good comparison–they will either share a general theme, but differ in meaning and style, or share a meaning, but are used differently and look differently. You can consider these aspects as you review the cards and try different matches.
When it’s time to take an actual test, minimize your jitters with a good night’s sleep and very little last-minute review–you can go through your cards, but relaxation is your best bet. Get to the classroom early so you can comfortably set up your materials: your blue or greenbook and your pen (and an extra), putting other materials away. Your test will generally have between four and six components: compare/contrast questions, which appear as pairs of slides that need to be discussed in terms of one another (review how this is done in Chapter 2.5), quick IDs that involve answering only one question per slide (Ethnic group? Artist’s name? Century or range of centuries? Site? Country?), long IDs that discuss style, meaning, and function (review this is Chapter 2.5), fill-in-the-blanks (definitions, map identifications, factual information, gender and art form), and an essay (usually choice of a theme requiring you to tie certain artworks to the theme as evidence, explaining your choices). Sometimes there are extra credit questions as well.
The segments of tests are timed, but most professors allow some time at the end of an exam to look over your answers and complete interrupted thoughts. With this in mind, leave a short blank area after your comparison/contrast and long ID questions, in case you have time to add something at the end of the exam. With the time at the end, be sure that you’ve answered or guessed all questions, and that your identifications on the comparison/contrast and long IDs are complete. Is your name on the blue/greenbook? On your answer sheet? You’re finished! Treat yourself to a nice lunch and forget about it until your exam is returned.
Remember, except for basic information on gender in traditional art, map recognition, and terminology, the learning clock is reset after the midterm–that is, the final exam will not include the testable slides from the midterm, but will cover new material.
Your Test Components and Timing
Every professor has his or her testing idiosyncrasies. Some give multiple choice questions (not me), or give varying amounts of time for different components. This is what you can expect from my tests.
- First: The test will start with a comparison/contrast and you’ll have ten minutes to answer it. If you’re late to class, use your remaining time to make notes on the two pieces that you can write up at the end–the pair will only be shown once. Because you have a 50-minute class, you’ll probably only have one comparison/contrast on your midterm (your final could have more). It counts more than other test components, and requires you to first identify each piece (noting whether you’re talking about the left-hand or right-hand screen), then, in complete sentences, compare and contrast style, function, and meaning. If your mind goes blank, at least compare and contrast the stylistic elements thoroughly, and make educated observations based on our “rules” and other conventions.
- Second: Quick IDs generally follow, to give your fingers a rest. If you don’t recognize an object, use the 30 seconds (yes, that’s all the time they’re on screen) to sketch the object or note something down–you might remember it later in the exam. After all the IDs are seen, I’ll show them again more quickly so you can check your answers. If you don’t know, guess. These are not worth a lot, but can hurt your grade if you haven’t memorized. On a midterm, there might be 10 of them; a final exam might have more.
- Third: Fill-in-the-blanks. These are self-explanatory and you normally have five minutes to complete all of them. If you run out of time, fill them in at the end of the exam. Again, if you don’t know, guess. Usually, there are between five and ten questions.
- Four: Long IDs. You’ll have five minutes for each of these. They’re similar to the comparisons in that you first ID the object, then discuss its style, meaning, and function, but this time you’re only examining objects individually. On a midterm, you probably would only have three of these. They’re worth less than the comparison, but more than any other section.
- Five: Essay. There’s not enough time to complete an essay in your 50-minute midterm, but there might be one on the final exam. You would have a choice of themes, perhaps under the guise of “You’re curating a museum exhibition and need to select five diverse objects for the brochure that illustrate the theme of xxxxxxx. Be sure to be clear about which objects you’ve chosen, and, in a few sentences each, show how these illustrate the themes. Be sure they are addressing different aspects of the theme.”
- Six: Extra credit. Your exam might have an opportunity for extra credit. This comes in the form of seeing unknown slides that weren’t shown in class, but are from one of the regions or artists that we have covered. You would then have 30 seconds to write down the ethnic group/site/artist’s name via your recognition of style.
Key Takeaways Regarding Exams
- Make flashcards from the testable images in your Blackboard modules, as well as the African map, definitions, and art and gender
- Add your class notes and notes on readings to the back of your flashcards
- Look at your flashcards regularly via self-testing and a partner and/or study group
- Try to guess what questions might appear–particularly, what comparison/contrasts might be likely
- Look over the sample long ID and sample comparison in Chapter 2.5 to get a sense of expectations regarding degree of detail
- Sleep well the night before; don’t cram on the morning of the test
- ANSWER EVERY QUESTION. Your guess could be right.
- USE ALL THE TIME ALLOTTED FOR EACH QUESTION. If you’re not writing a comparison for ten minutes or a long ID for five minutes, your answer is probably too short and undeveloped.

