Chapter 8. Resource Management
8.7 Microsoft Project Tutorial
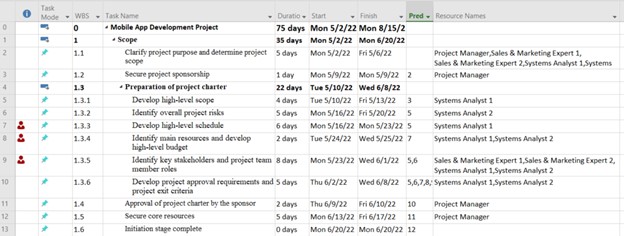
For the MS Project tutorial, let’s continue with our example of m-commerce project. Let’s focus on “1. Scope”. The WBS for the scope stage is in Table 8.4. This table also includes the duration, start and finish dates, and predecessors.
| WBS | Task Name | Duration | Start | Finish | Predecessors |
| 1 | Scope | 35 days | Mon 5/2/22 | Mon 6/20/22 | |
| 1.1 | Clarify project purpose and determine project scope. | 5 days | Mon 5/2/22 | Fri 5/6/22 | |
| 1.2 | Secure project sponsorship | 1 day | Mon 5/9/22 | Mon 5/9/22 | 2 |
| 1.3 | Preparation of project charter | 22 days | Tue 5/10/22 | Wed 6/8/22 | |
| 1.3.1 | Develop high-level scope | 4 days | Tue 5/10/22 | Fri 5/13/22 | 3 |
| 1.3.2 | Identify overall project risks | 5 days | Mon 5/16/22 | Fri 5/20/22 | 5 |
| 1.3.3 | Develop high-level schedule | 6 days | Mon 5/16/22 | Mon 5/23/22 | 5 |
| 1.3.4 | Identify main resources and develop a high-level budget | 2 days | Tue 5/24/22 | Wed 5/25/22 | 7 |
| 1.3.5 | Identify key stakeholders and project team member roles | 8 days | Mon 5/23/22 | Wed 6/1/22 | 5,6 |
| 1.3.6 | Develop project approval requirements and project exit criteria | 5 days | Thu 6/2/22 | Wed 6/8/22 | 5,6,7,8,9 |
| 1.4 | Approval of project charter by the sponsor | 2 days | Tue 6/9/22 | Fri 6/10/22 | 10 |
| 1.5 | Secure core resources | 5 days | Mon 6/13/22 | Fri 6/17/22 | 11 |
| 1.6 | Initiation stage complete | 0 days | Mon 6/20/22 | Mon 6/20/22 | 12 |
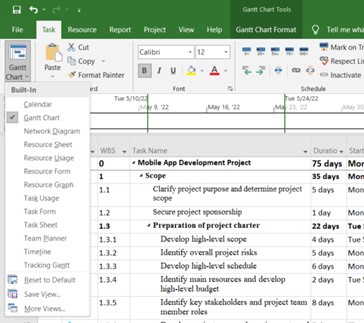
Let’s identify the resources that we can use for the scope. We should enter them in the Resource Sheet after we click “Resource Sheet” in the dropdown menu (Figure 8.9).
In the Resource Sheet window, we can type the resources. There are three types of resources in MS Project:
- Work: Work resources are people and equipment. They have a standard rate per hour.
- Material: Material resources are consumable supplies. They have a unit of measurement such as tones, boxes, and cubic yards.
- Cost: Cost resources are independent costs we want to associate with a task such as a plane ticket.
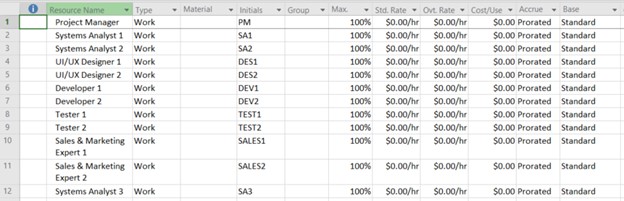
Let’s type all the resources as seen in Figure 8.10. In this chapter, we won’t write standard rates, overtime rates, and cost/use. We will detail them in Chapter 9. We are only typing the human resources in this tutorial. Therefore, they are classified as “Work” type. We keep “Max” (Maximum units) 100% as they work full-time.
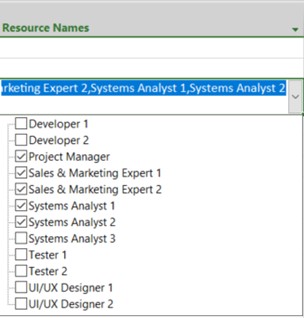
After we type the resources, we can assign them to their tasks in the Gantt Chart window on the dropdown menu (Figure 8.9).
After we assign all the resources to their relevant tasks, we can see the information below as in Figure 8.12.
The Gantt chart which is on the right side of the window would be as in Figure 8.13. The MS Project illustrates the Gantt chart with bars and the resources assigned to each task to the right of each task bar. As explained in Chapter 7, the red bar displays a critical path, and the blue bar displays a non-critical path.
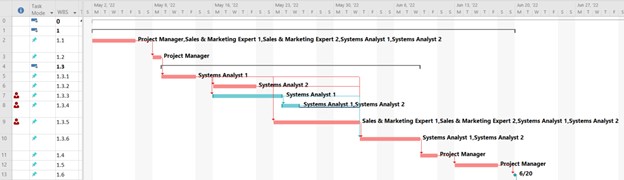
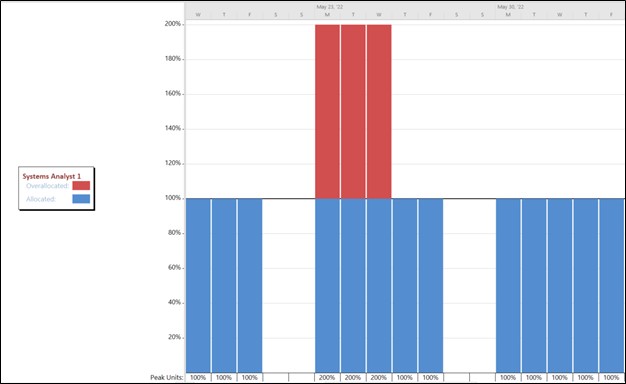
As can be seen in Figures 8.12 and 8.13, there are three red people indicators in the first column. This is a warning for overallocated resources. We can investigate more to understand which resources are overallocated. On the dropdown menu in Figure 8.9, we can select “Resource Graph”. Figure 8.14 shows us that Systems Analyst 1 is overallocated on three days, which is more than 100%.
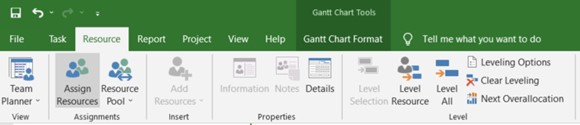
We can implement resource leveling for these three activities. On the “Resource” tab, we can select “Level Resource” or “Level All” (Figure 8.15). Leveling options can also be modified. For this tutorial, we are not changing the options.
When we click “Level All”, MS Project levels the resources in these three activities with resource overallocation (Figure 8.16). Therefore, our resource overallocation is resolved. The duration of 1.3 was 22 days before resource leveling. After the leveling, it is 25 days. Therefore, there is a 3-day slippage as we are using the same resources, and aren’t allocating new resources. However, the total duration of “1. Scope” didn’t change, and stayed at 35 days after leveling.
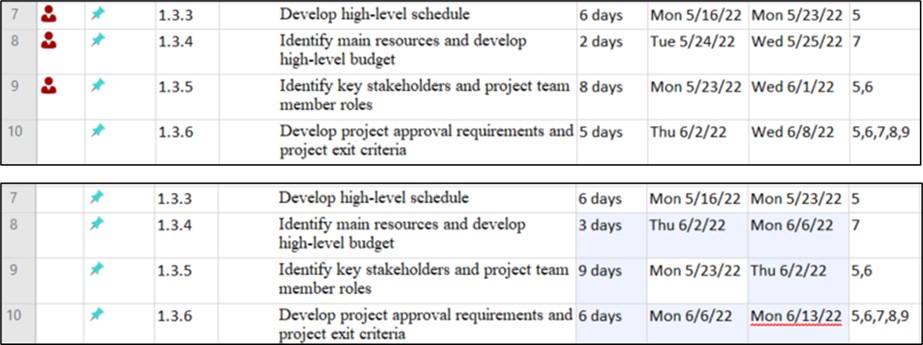

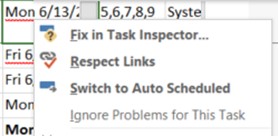
But we now experience a schedule slippage as seen in Figures 8.16 and 8.17. Besides, 1.3.6 and the following activities are affected. 1.3.6 has an underlined text for the Finish Date, which means that there is a scheduling problem. After resource leveling, it is common to experience schedule problems in the following activities. To solve the scheduling problem in 1.3.6 and the following activities, we can click “Respect Links” for 1.3.6 and all the following activities. Besides, MS Project gives some options when we right-click on an underlined date as seen in Figure 8.18. When we right-clicked on the underlined finish date (Mon 6/13/22) of 1.3.6, it gave us the options “Fix in Task Inspector”, “Respect Links”, and “Switch to Auto Scheduled”.
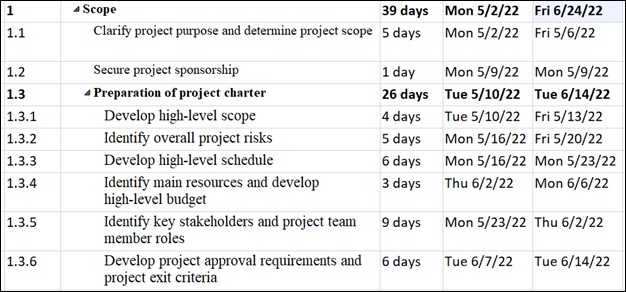
After all the scheduling problems are corrected, the total duration of Scope goes up to 39 days from 35 days (Figure 8.19).